Button Gaping:
Why It Happens and How to Fix It
Button gaping has several causes, and each needs a different fix. Diagnose whether the problem is overall tightness, button spacing, weak fabric, shrinkage or a single local gap before altering the shirt.

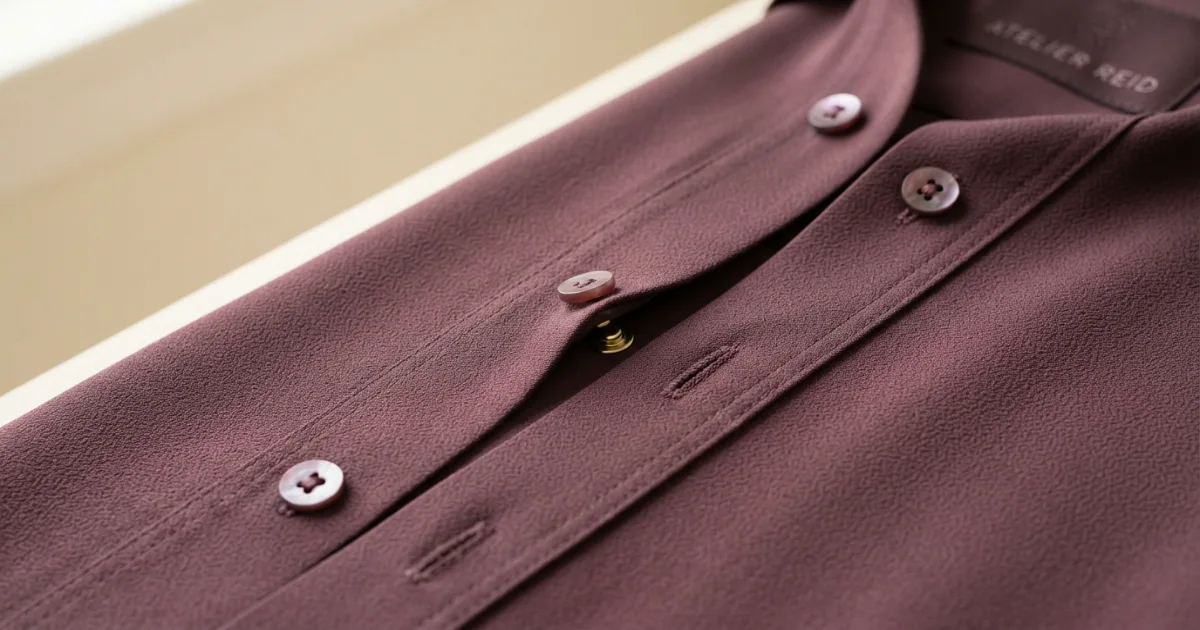
- Diagonal wrinkles across several buttons mean the shirt is too small through the front.
- A single clean gap can often be fixed without changing the whole fit.
- Wash and dry the shirt before permanent button alterations.
Find the source of tension before choosing the fix
A gaping placket is not one problem. Sometimes the whole shirt is too narrow across the bust; sometimes the button spacing misses the fullest point by an inch; sometimes a soft fabric folds open even though the circumference is adequate.
The pattern of wrinkles tells you which version you have. Radiating lines from multiple buttons point to insufficient room. A smooth shirt with one opening between buttons suggests a local closure problem. A front hem that rises sharply suggests missing front length as well as width.
Once the diagnosis is clear, the repair can be proportionate. Tape is useful for a temporary event, a hidden snap works for a stable local gap, and a different shirt pattern is the only honest solution when the entire bodice is under strain.
Placket diagnosis map
Do not ask one hidden snap to carry the load of an undersized front panel. Local fixes are for local gaps.
Read wrinkles, buttons and hem position
Use this table with placket diagnosis map: each row connects a style choice to visible construction evidence and the way it influences bust circumference, button spacing, placket reinforcement and front length.
| Choice | Construction check | Why it helps |
|---|---|---|
| Fuller-Bust Shirt Patterns | For fuller-bust shirt patterns, the placket and side seam should remain vertical, with a button positioned close to the fullest point. | Fuller-Bust Shirt Patterns creates a clearer line because its key seams remain aligned during placket diagnosis map. |
| Stretch Poplin | For stretch poplin, check the relevant seam, edge, length and fabric response during placket diagnosis map. | A stable stretch poplin survives sitting and layering with fewer pins, tape or rescue adjustments. |
| Hidden Button At The Fullest Point | For hidden button at the fullest point, button placement matters only after the front panel has enough circumference and front length. | Hidden Button At The Fullest Point becomes easier to repeat when its neckline, waist and hem stay where the pattern intended. |
| Inside Snap | For inside snap, check the relevant seam, edge, length and fabric response during placket diagnosis map. | The construction lets inside snap shape the outfit instead of fighting the bust through movement. |
| Back Darts After Buying For Bust | For back darts after buying for bust, the dart should point toward, not finish on, the fullest point and release smoothly into the bodice. | A well-built back darts after buying for bust reduces the need for compensating camisoles or outer layers. |
| Split-Neck Alternatives | For split-neck alternatives, a split neck adds a vertical opening without requiring the depth of a full V. | A stable version of split-neck alternatives keeps the outfit predictable from the front and side. |
When two options for button-placket tension appear equally attractive, favor the one that passes placket diagnosis map with fewer support or alteration requirements.
Match the solution to the type of gap
These options approach button-placket tension from different construction angles; use placket diagnosis map to compare seam placement, material and movement instead of trusting the style name.
Fuller-bust shirt patterns
Fuller-bust shirt patterns works when the placket and side seam should remain vertical, with a button positioned close to the fullest point; Repeated motifs should remain the same size across the bust and lower torso.
Stretch poplin
Stretch poplin can work when the main seams and edges stay quiet through movement; in the fitting room, breathe deeply while seated and watch whether several gaps appear.
Hidden button at the fullest point
Hidden button at the fullest point works when button placement matters only after the front panel has enough circumference and front length.
Inside snap
Inside snap can work when the main seams and edges stay quiet through movement; in the fitting room, mark the fullest point and compare it with the nearest button.
Placket diagnosis map
Stand side-on and identify where the first diagonal wrinkle begins. If tension radiates from several buttons, the shirt needs more room. If one small gap appears only between two otherwise flat buttons, a hidden button or snap may be enough.
Run placket diagnosis map once with the garment alone and again with the intended bra or outer layer. Note the first point that changes, because a hidden snap can close a small stable gap but cannot rescue a shirt whose entire front panel is undersized. Record whether the change begins when you mark the fullest point and compare it with the nearest button., breathe deeply while seated and watch whether several gaps appear., or check the shirt after laundering before moving buttons.. The earliest failure point in placket diagnosis map tells you whether to change size, construction, support or styling. Repeat the test after twenty minutes of wear so warmth and movement can affect bust circumference, button spacing, placket reinforcement and front length. Save the result with the brand, size, fabric and bra used; that record makes future decisions about button-placket tension faster and more accurate. During placket diagnosis map, a change repeated in both passes is construction evidence, while a change appearing only with one layer identifies a compatibility problem.
- Mark the fullest point and compare it with the nearest button.
- Breathe deeply while seated and watch whether several gaps appear.
- Check the shirt after laundering before moving buttons.
Fixes that hide the symptom but keep the strain
The following missteps all confuse the visible symptom with the underlying issue. Each one is better corrected by changing the specific construction detail that affects bust circumference, button spacing, placket reinforcement and front length.
Taping a severely tight shirt
Taping a severely tight shirt is a problem when tape can close a tiny local opening, but it cannot carry tension from an undersized front panel; Choose more bust room first.
Sizing up without checking shoulders
Sizing up without checking shoulders is a problem when sizing up may add circumference while dropping the shoulder, armhole and waist; Look for a better pattern block before taking another size jump.
Moving one button without checking tension
Moving one button without checking tension is a problem when moving a button helps only when the rest of the placket lies flat; Multiple diagonal wrinkles signal a width problem, not a spacing problem.
Ignoring shrinkage
Ignoring shrinkage is a problem when a shirt or knit can change noticeably after laundering; Complete the care cycle before moving buttons or paying for waist alterations.
For button-placket tension, correct the first displaced landmark—edge, seam, closure, waist or hem—then repeat placket diagnosis map before adding another styling device.
Test the placket through a normal workday
A still mirror cannot prove that bust circumference, button spacing, placket reinforcement and front length will remain controlled, so complete these checks without smoothing between steps and use placket diagnosis map as the final reference.
Fasten the garment, breathe deeply and sit; several pulling points confirm that a hidden snap can close a small stable gap but cannot rescue a shirt whose entire front panel is undersized.
Sit naturally for two minutes and stand without tugging; any lasting shift supports the diagnosis that a hidden snap can close a small stable gap but cannot rescue a shirt whose entire front panel is undersized.
Reach across the body as if fastening a seat belt; restriction or twisting is evidence that a hidden snap can close a small stable gap but cannot rescue a shirt whose entire front panel is undersized.
Use a side mirror or phone photograph to find hem lift or bowing, visible signs that a hidden snap can close a small stable gap but cannot rescue a shirt whose entire front panel is undersized.
Add the exact outer layer planned for the outfit; new pulling means that a hidden snap can close a small stable gap but cannot rescue a shirt whose entire front panel is undersized.
Complete this action without smoothing the garment and use placket diagnosis map to judge whether a hidden snap can close a small stable gap but cannot rescue a shirt whose entire front panel is undersized.
Classify what placket diagnosis map revealed: a construction failure, a contained alteration or a personal style preference; return major failures and price small corrections before deciding.
Ways to wear buttoned shirts without daily rescue
These combinations show how button-placket tension can change mood and formality while keeping the underlying construction decisions intact.
Stretch button-down
Wear the stretch button-down with a clean-waist trouser or skirt and an optional open layer; the stretch button-down needs enough front ease for its placket or neckline to remain flat when seated.
Shirt worn open over scoop base
Wear the shirt worn open over scoop base with a clean-waist trouser or skirt and an optional open layer; the shirt worn open over scoop base needs enough front ease for its placket or neckline to remain flat when seated.
Concealed-placket blouse
Wear the concealed-placket blouse with a clean-waist trouser or skirt and an optional open layer; the concealed-placket blouse needs enough front ease for its placket or neckline to remain flat when seated.
Shaped shirt dress with hidden snap
Wear the shaped shirt dress with hidden snap with a clean-waist trouser or skirt and an optional open layer; the shaped shirt dress with hidden snap needs enough front ease for its placket or neckline to remain flat when seated.
Fabric, shrinkage and reinforcement matter
For button-placket tension, the support layer changes projection and width, but it cannot supply missing fabric; test the final bra before judging bust circumference, button spacing, placket reinforcement and front length.
Tailoring is worthwhile only when the bust and shoulder are comfortable and the remaining issue is local enough to preserve button-placket tension.
Temporary event fix versus permanent wardrobe fix
Adjust the strategy to the setting by checking whether bust circumference, button spacing, placket reinforcement and front length remain functional for the hours, movement and visual expectations involved.
Everyday wear
For everyday button-placket tension, choose pieces that survive sitting, carrying a bag and laundering without tape or repeated adjustment.
Work and polished settings
In polished settings, bust circumference, button spacing, placket reinforcement and front length should remain controlled through a full seated day rather than only during a mirror check.
Events and photographs
For events and photographs, test the exact bra, lighting and outer layer because a hidden snap can close a small stable gap but cannot rescue a shirt whose entire front panel is undersized becomes clearer from side angles and flash.
Seasonal layering
In seasonal layering, preserve button-placket tension by adding warmth without crowding the same neckline, armhole or waist area.
Product details that predict a better shirt
For button-placket tension, compare online measurements with a successful garment you already own instead of relying on the size name.
Save the reference piece’s front length, shoulder width, armhole depth and fabric composition because those landmarks predict bust circumference, button spacing, placket reinforcement and front length.
Study side and back photographs for evidence that a hidden snap can close a small stable gap but cannot rescue a shirt whose entire front panel is undersized is being hidden by front-only styling.
Prioritize reviews that discuss bust room, recovery, bra coverage and landmark placement relevant to placket diagnosis map.
Before ordering for button-placket tension, confirm the return window and decide what level of alteration would still make the finished garment worthwhile.
Alter this shirt or replace the pattern?
Keep the garment when it manages bust circumference, button spacing, placket reinforcement and front length through placket diagnosis map and works with your real support layer and care routine.
Consider alteration when button-placket tension is structurally sound and the remaining problem is contained to a dart, waist, strap, sleeve, button or hem.
Return it when a hidden snap can close a small stable gap but cannot rescue a shirt whose entire front panel is undersized remains after the correct size, bra and simple styling adjustments have been tested.
Record brand, size, fabric and front length from the successful placket diagnosis map so the next purchase begins with evidence.
A placket should lie quiet
The strongest result for button-placket tension is comfortable, deliberate and easy to repeat rather than overloaded with universal rules.
Use placket diagnosis map, side views and real wear to create personal guidance that is more accurate than a generic shape chart.
Frequently asked questions
Practical answers for the decisions that usually appear after the first try-on.
What is the main rule for fix button gaping large bust?+
Button gaping comes from insufficient usable bust room, poor button spacing, rigid fabric or inadequate front length. Add room before relying on tape.
Do I need to avoid taping a severely tight shirt completely?+
No. The concern is the way taping a severely tight shirt affects fit or proportion. A modified cut, better fabric or different placement can change the result.
Which option is the safest starting point?+
Fuller-Bust Shirt Patterns is a practical starting point, but it still needs adequate bust room, stable construction and compatibility with your support layer.
Can tailoring improve the result?+
Yes, when the shoulders and bust already have enough room. Waist shaping, sleeve shortening, hidden closures and seam refinement are usually more predictable than adding significant fabric.
How should I judge the outfit in the fitting room?+
Check it standing, sitting, reaching and from the side. Look for level hems, stable necklines, straight seams and freedom from repeated adjustment.
Does color determine whether this works?+
Color can direct attention, but it cannot correct pulling, poor front length or unstable construction. Fit, fabric and line come first.
Related guides
Move to the next connected fit decision instead of starting from zero.
Fit first. Style always.
Keep the garment that remains stable, comfortable and recognizably yours after the complete movement test.