How to Avoid Bra Strap Slipping at Work
A practical diagnosis-and-fix guide for keeping bra straps secure through desk work, commuting, meetings and layered office outfits—without relying on painful over-tightening.

The 90-second strap-slip diagnosis
- Settle the cups: lean slightly forward, place all tissue inside the cup and check that the wire or cup edge surrounds it without cutting in.
- Level the band: it should sit in the same horizontal position front and back rather than climbing toward the shoulder blades.
- Adjust independently: shorten each strap only until secure; shoulders and breast position are not always symmetrical.
- Move like a workday: type, reach for a shelf, put on a blazer, turn to speak and lift the normal tote strap.
- Observe the pattern: note whether one strap, both straps, only the bag-side strap or only an older bra slips.
Why bra straps slip during the workday
A falling strap is a symptom, not a diagnosis. It can come from a loose band, a cup that is too small or shallow, a strap attachment that is wider than the shoulders, polished strap elastic, shoulder asymmetry, worn materials or the way a jacket and bag move over the shoulder. Office routines often expose a marginal fit because they repeat the same small actions for hours: reaching toward a keyboard, leaning to one side, rotating toward a second monitor and lifting a tote.
The band is the first checkpoint because it should provide most of the support. When it is too loose, the back can travel upward and the front can tip downward. That changes the route of the straps, allowing them to drift outward even if their length looked acceptable at home. A larger band is not automatically more comfortable; stability comes from a firm, level fit that allows normal breathing and does not painfully compress.
Cup fit can create the same symptom indirectly. A cup that is too small, shallow or low in projection may be pushed away from the body. The extra forward pull changes strap tension and can make the back ride. A cup that is too large in the wrong area may also leave the upper edge and strap attachment unstable. Look at the whole bra instead of assuming every falling strap is simply long.
| What you observe | Most likely area to check | First response | What not to assume |
|---|---|---|---|
| Both straps slip and the back band rises | Band circumference or stretched band elastic | Recheck a firmer level band and cup volume | That both straps only need shortening |
| Both straps slip but the band stays level | Wide-set strap position, shoulder slope or slick elastic | Try close-set, center-pull, U-back or racerback geometry | That the shoulders are the problem to “correct” |
| One strap always slips | Natural shoulder height, posture, bag use or asymmetric adjustment | Adjust each side separately and test without the bag | That both sliders must match visually |
| Strap slips after the cup shifts forward | Cup size, shape or wire placement | Settle tissue and reassess cup depth and containment | That tighter straps can hold an incompatible cup |
| Only an older bra slips | Elastic fatigue, damaged adjusters or stretched fabric | Compare recovery with a newer well-fitting bra | That a clip will restore worn support |
| Only the tote-side strap falls | Bag friction and repeated shoulder motion | Change bag position, load or strap texture during the test | That the bra alone is responsible |
Shoulder shape and asymmetry are normal
Sloping or narrow shoulders can make widely spaced straps more likely to drift, but the solution is garment geometry—not changing posture all day. One shoulder may also sit slightly lower, especially after habitual bag carrying or normal skeletal variation. Adjusting the two straps to different lengths is legitimate. Match security and comfort, not slider symmetry.
Friction can push in either direction
A silky blouse may let a marginal strap slide outward with little resistance. A textured blazer lining may grip the strap and drag it as the arm moves. Backpack straps can pull bra straps toward the neck; a shoulder bag can push one outward. Test the complete outfit and commute setup before judging the bra. This workwear-first approach also helps when planning a broader large-bust office wardrobe.
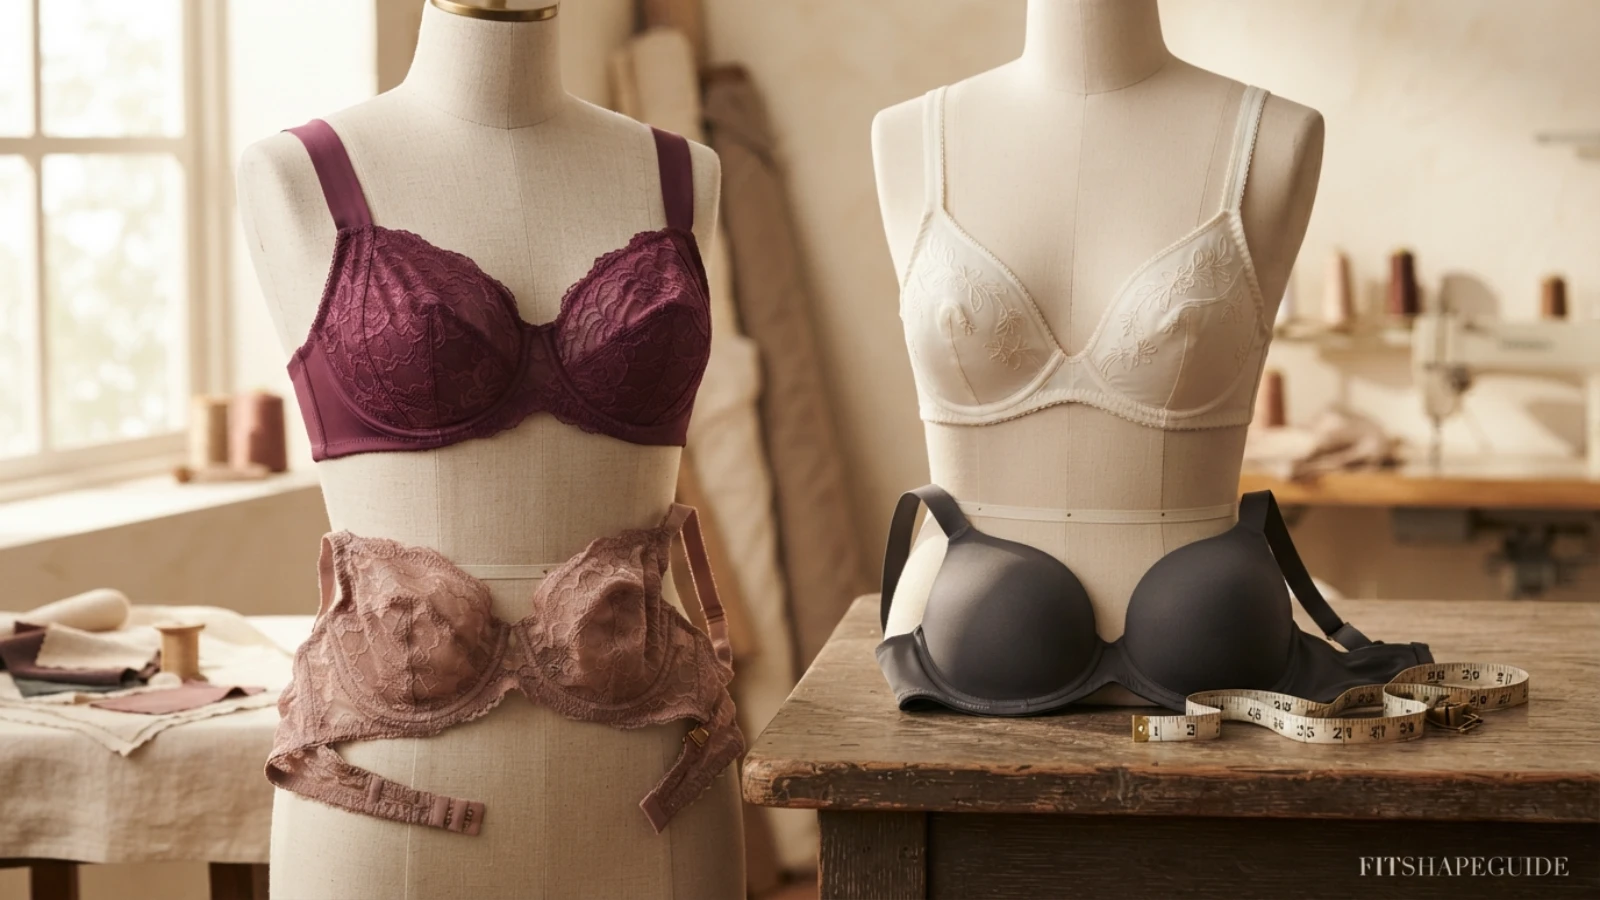
Adjust a bra so the straps can do their job
Put the bra on using the loosest comfortable hook when it is new, unless the maker directs otherwise. Position the band low and level, then settle all breast tissue into the cups. The center and wire behavior depend on the bra style, but there should be no tissue trapped under a wire, spilling over an edge or pushed into the underarm. Only after the band and cups are placed should you adjust the straps.
Slide each adjuster until the strap stays on the shoulder during normal movement. A practical check is that it feels secure without grooves, numbness, red pressure or a strong upward pull on the band. Finger rules are only rough guides because strap widths, elastic strength and bodies differ. Comfort and system stability matter more than hitting a fixed gap.
Place the band
Fasten it so it remains level while breathing, sitting and raising the arms. If it rises despite correct cup placement, reassess band size or elastic condition.
Settle the cups
Bring tissue from the sides into the cup and confirm that the cup contains it without cutting, folding, floating or being forced away from the torso.
Shorten gradually
Move the slider in small increments, then roll the shoulders and reach forward. Excess shortening can lift the back and make the entire bra less stable.
Match each shoulder
Use different strap lengths when needed. Recheck after washing, after the first hour of wear and whenever one side begins to drift.
Why over-tightening fails
Straps are designed to stabilize the upper cup and contribute to lift, but they should not suspend the bra by themselves. Pulling them extremely short can make the band ride, distort the cup, concentrate weight on the shoulders and create a new cycle of readjustment. If a strap becomes secure only when painful, the band, cup or strap placement needs another look.
Strap length can also change during wear if the slider creeps on smooth elastic. Mark the successful position with a removable thread tack, photograph it for reference, or ask a tailor to add a discreet stop if the hardware repeatedly moves. Do not glue the slider or permanently alter a new bra before confirming fit and return eligibility.
Bra constructions that resist strap slipping
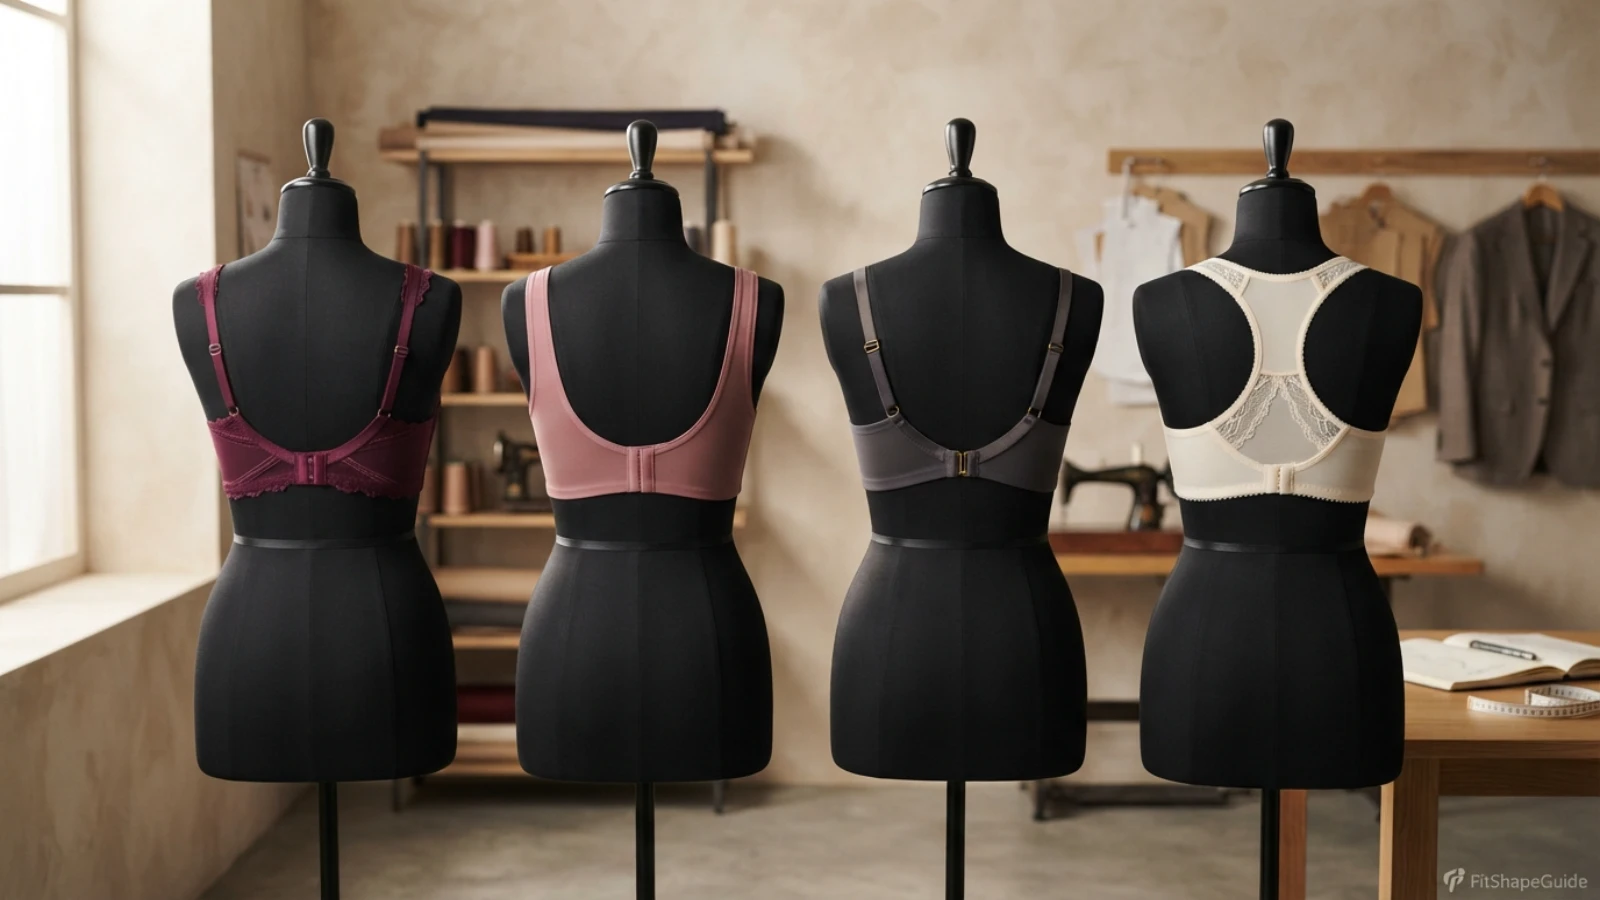
When band and cup fit are sound but straps still drift, look at where the straps begin and where they meet the back. Two bras in the same nominal size can place those points very differently. Close-set or center-pull front straps direct tension nearer the center of the shoulder. Full-cup styles often use this arrangement, though construction varies by product. A U-shaped or leotard back can anchor the straps closer together and reduce their outward route.
Racerbacks and J-hooks bring the straps toward the spine. They can be useful for narrow or sloping shoulders and for active commutes, but they also change pressure distribution. Some people feel more load near the neck; some office necklines reveal the converted straps; and a fixed racerback can be harder to put on. Treat the feature as a geometry option, not a guaranteed cure.
| Construction | How it can help | Best work use | Trade-off to test |
|---|---|---|---|
| Close-set or center-pull front straps | Places the strap path nearer the center of the shoulder | Everyday desk bras under shells and shirts | May alter neckline coverage or cup shape |
| U-back or leotard back | Brings rear attachment inward and supports band stability | Long office days and open blazers | Back shape may show under wide-back necklines |
| J-hook convertible straps | Temporarily joins straps into a racerback route | Commutes, presentations or slippery layers | Can increase neck pressure; adjust length first |
| Fixed racerback | Prevents straps from moving independently toward shoulder edges | Active travel, office gyms or uniform layers | May be visible and can be difficult to fasten |
| Full-cup with stable upper panel | Can combine containment with a more central strap attachment | Button-downs, blazers and higher necklines | Upper edge must match breast shape without gaping |
| Multiway straps | Allows cross-back or narrower placement | Occasional neckline conflicts | Hooks must lie flat and hardware must not rub |
Strap width is not the same as strap placement
A wider strap can distribute pressure across more surface area, which may feel comfortable for a large bust, but it can still fall if attached too far outward. Likewise, a narrow strap can remain secure if its geometry, elastic and adjuster are compatible. Evaluate width, grip, placement and recovery together.
Look at the full upper-back route
Product photos often emphasize the front. Search for rear views and check whether the straps form a wide vertical path, taper inward to a U-back, cross, or connect to a J-hook. Confirm whether the strap is fully adjustable; some designs only adjust across a short section. For everyday workwear, enough adjustment range matters because elastic relaxes with wear and bodies are not identical from side to side.
Test desk work, commuting and repeated reaching
A fitting-room pose cannot predict eight hours of small movement. Wear the bra for a controlled home test with the exact office top and layer. Sit at a desk for ten minutes, place both forearms on the keyboard, reach toward the mouse, rotate to each side and lift the arms as if taking a file from a shelf. The band should remain level, the cups should stay anchored and the straps should return to position without being manually replaced.
Next, test the commute. Put on the coat, backpack, crossbody or shoulder bag you actually use. Walk stairs and remove the outer layer twice. If slipping appears only after the bag is added, shift the bag route, reduce the load, use the opposite shoulder periodically or choose a backpack whose shoulder straps do not collide with the bra attachment. A perfect bra cannot fully resist a heavy bag repeatedly sweeping its strap outward.
Desk posture is information, not a moral test
Leaning, reaching and sitting asymmetrically are normal parts of work. The goal is not to hold the shoulders rigid for hours. If one strap falls whenever you reach for a mouse, move the mouse closer as an ergonomic improvement and reassess the bra geometry. If it still falls in neutral movement, the clothing system needs adjustment.
Run three short checkpoints
- Arrival: note band level and strap position after the commute before making adjustments.
- Midday: check whether sliders moved, elastic relaxed or a layer pushed one strap outward.
- End of day: look for pressure marks, tenderness, cup movement and the number of manual resets.
A well-chosen work bra should not require constant monitoring. One small adjustment after dressing can be normal, but repeated resets every hour are evidence that fit, construction, condition or outfit interaction needs changing. Record which bra, top, layer and bag were used; patterns become obvious faster than memory alone suggests.

Choose tops and blazers that do not dislodge straps
A bra can fit correctly and still conflict with a garment. Very wide necklines may sit beyond the strap route and rub it outward. Tight armholes can grip the front strap and pull during reaching. Slippery linings permit movement, while rough seams may catch the adjuster. Test the garment over the bra before removing tags, especially when the shoulders are narrow, the straps are wide or the top uses an unusual cut.
Button-down shirts
A shirt that is tight across the bust can pull the armhole and shoulder seam forward, changing the strap path. Choose enough bust room, shaping through darts or panels and a shoulder seam that sits near the shoulder joint. A secure placket also reduces the urge to tighten the bra to change garment fit. The no-gape button-down guide explains placket, bust-dart and seated-reach tests.
Blazers and jackets
Check the armhole, shoulder pad, sleeve pitch and lining. If the jacket shoulder extends far beyond the body, it can move independently and tug the top underneath. If the armhole is tight, lifting the arm can drag multiple layers upward. Try the jacket open and buttoned, then reach forward as in a meeting. Use the large-bust work-blazer guide to assess lapels, button stance and shoulder structure without asking the bra to correct the jacket.
Knits, shells and wide necklines
Fine knits can reveal slider ridges or catch on textured strap edges. An opaque shell with a moderate neckline often gives the simplest stable route under a blazer. Boat, square and wide scoop necks need the bra straps to sit within the garment edge through movement; a multiway or racerback option may work, but never convert the straps so tightly that the cup or band distorts. For additional neckline and shaping options, compare the best tops for a large bust.
Office outfit planning
Instead of finding one bra that must disappear under every garment, build two or three dependable bra-and-top combinations: an everyday close-set style for shells and button-downs, a convertible option for wider necklines and a softer alternative for low-movement days. This makes business-casual outfit planning faster and reveals when a problem belongs to one garment rather than the body.
Temporary bra-strap fixes for a workday
Accessories can solve occasional garment conflicts, but they should not disguise painful fit or exhausted elastic. Test any device at home for at least an hour. Check skin pressure, hardware edges, removal, visibility under the intended top and whether you can manage it without assistance. Keep packaging until the setup proves workable.
| Temporary fix | Useful when | How to use it | Limitation |
|---|---|---|---|
| Built-in J-hook | A convertible bra already fits well and straps need a narrower route | Lengthen straps slightly before joining, then check neck pressure | Can pull too high or show at the neckline |
| Separate converter clip | Occasional racerback conversion under a covered back | Attach symmetrically, verify smooth edges and rehearse removal | Does not fix a loose band or wrong cups |
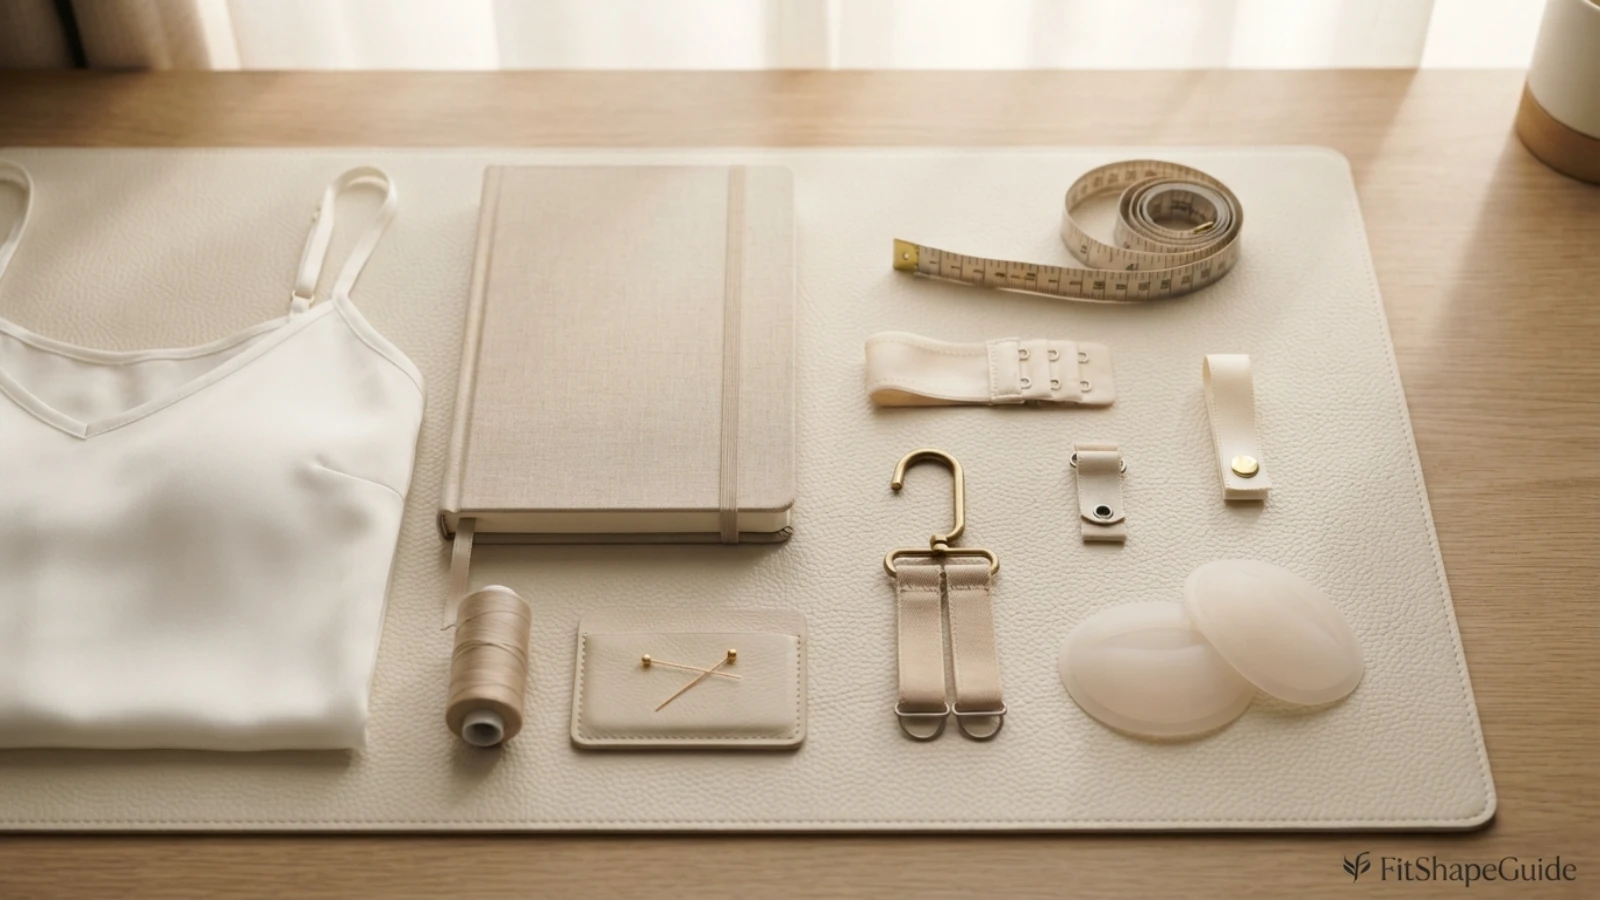
| Fabric strap keeper | A particular blouse or dress repeatedly exposes or pushes the strap | Have a small ribbon-and-snap loop sewn inside each shoulder | Belongs to the garment and needs careful placement |
| Silicone shoulder cushion | Pressure distribution or light grip is needed | Place flat on clean, dry skin and check the edges during motion | May show, trap heat or irritate sensitive skin |
| Fashion tape | A short event needs a garment edge stabilized away from a strap | Patch-test, apply to clean dry skin and remove gently | Adhesive can irritate and is not structural support |
| Small sewing alteration | A slider repeatedly creeps after correct fit is established | Add a reversible thread stop or ask a tailor to secure the adjuster | May affect returns and future adjustment range |
Garment strap keepers are often the neatest office fix
A lingerie keeper is a tiny fabric loop, usually with a snap, sewn inside a garment shoulder. It encloses the bra strap and helps keep the garment and strap aligned. Because it is attached to clothing rather than skin, it can be discreet and reusable for a troublesome dress or blouse. The keeper should not pull the strap outward; placement must match the secure natural strap route.
Avoid sharp or high-tension improvisation
Do not use an open safety pin against skin or place a pin where bra tension can force it open. Avoid tying straps together with a tight elastic band, because the knot can create pressure and pull hardware into the back. Do not use household glue, rough clips or strong adhesive not designed for skin. A workday involves long wear, heat and repeated motion; a quick hack can become an injury or garment-damage risk.
Prepare a small desk kit
For occasional problems, keep one smooth converter clip, a spare garment-safe fashion tape product, a soft measuring tape and a backup opaque camisole or shell. The backup layer cannot repair support, but it can make an unexpected visible strap less distracting until the underlying fit is corrected. Store accessories clean and follow their care instructions.
Care, replacement and smarter online shopping
Elastic loses recovery through wear, heat, oils, harsh washing and time. Rotate bras so the same band and straps are not stretched every day. Follow the maker’s care label; when hand washing is recommended, use cool or lukewarm water and gentle detergent, rinse thoroughly and air-dry away from direct heat. Fasten hooks before washing or use a protective laundry bag if the label permits machine washing. Avoid a hot dryer unless explicitly allowed because heat can accelerate elastic damage.
After washing, compare the strap with a newer bra. It should return toward its resting length rather than remain wavy, thin or permanently extended. Check the adjuster for cracking, bending or slipping and inspect where the strap joins the cup and band. Retire the bra from full workdays when the band no longer stays level on the firmest practical hook, the straps cannot hold their adjustment, the cups or wires are damaged, or discomfort persists.
Rotate by function
Keep a small rotation based on actual office use: a dependable everyday bra, a convertible or central-strap option for difficult necklines and a comfortable spare for lower-movement days. Rotation gives elastic time to recover and prevents one bra from becoming the single point of failure before a presentation or commute.
What to verify online
- Use the current size chart: record snug underbust and full-bust measurements according to the brand’s instructions, while recognizing that sizing methods vary.
- Inspect front and back photos: identify strap attachment, U-back shape, J-hook, adjustment range and hardware position.
- Read construction details: check cup seams, lining, wire or wireless structure, band closure, elastic and strap width.
- Check size availability: do not assume sister sizes preserve cup depth, wire width or strap placement exactly.
- Review returns before purchase: bras are intimate apparel and return rules may differ for tags, packaging, sale status or wear.
- Test clean and carefully: keep tags attached, avoid fragrance or deodorant transfer and use only indoor movement until fit is confirmed.
Customer reviews can reveal repeated reports of slider movement or wide-set straps, but they cannot determine your fit because the reviewer’s body, size and expectations may differ. Give more weight to actual measurements, rear-view construction and a return policy that permits a careful try-on. Any future Amazon recommendation on this page should use a direct verified listing and disclose the affiliate relationship; search-result links and unverified claims should not be published.
Common workday strap problems and practical responses
The strap falls only after lunch
Elastic may relax as it warms, or repeated desk motion may gradually move the slider. Mark the morning setting, observe whether the hardware moved and compare on a different day with another top. If the band also rises, reassess band stability rather than shortening only the straps.
The strap slips under one blazer
The jacket’s lining, shoulder pad or armhole may be moving the layer beneath it. Test the same bra with a cardigan and the same blazer with another bra. If the problem follows the blazer, alteration or a garment strap keeper may be more appropriate than changing bra size.
One side falls while using a mouse
Adjust that strap independently and move the mouse within an easy forearm reach. Then test without the usual bag, which may have already shifted the shoulder layers during the commute. Persistent one-sided slipping with every bra may benefit from closer-set construction rather than ever-shorter adjustment.
The bra stays up but shoulder grooves hurt
Security achieved through pain is not a successful fit. Loosen the straps, restore a level band and reassess cup volume and projection. A wider strap may distribute pressure, but the band still needs to provide the main anchor. Seek an experienced fitter or healthcare professional if pain, numbness, skin injury or headaches continue.
A racerback stops slipping but hurts the neck
Lengthen the straps before connecting the J-hook and position the connection as low as the construction permits while remaining secure. If pressure continues, return to a U-back or center-pull style that narrows the path without concentrating it near the neck. The office day is too long for a conversion that is tolerable only for minutes.
The strap shows beside a wide neckline
First check whether the neckline itself remains workplace-appropriate during reaching. Then try a bra with more central attachment, a cross-back option designed for the purpose, or a strap keeper inside the garment. Do not force a normal strap far inward if that distorts the cup.
The band feels firm but still moves
Firmness alone does not prove fit. Cup tension can tip the band, a narrow band may roll, or the bra may be sitting too high. Reset the cups and band, check the full circumference and try a different cup shape or band construction. A fitter can compare sizes and styles without assuming that one number solves every brand.
A bra works at a desk but not in an interview
Interview days can involve a coat, bag, walking, waiting and unfamiliar chairs. Rehearse the full outfit and commute, and choose the most dependable tested combination rather than a brand-new bra. The large-bust interview outfit guide can help coordinate the remaining layers without introducing new fit variables.
Final verdict
The best way to avoid bra strap slipping at work is to stabilize the whole bra before tightening the straps. Confirm a level supportive band, compatible cup volume and shape, then adjust each shoulder independently. If fit is sound but straps still drift, choose more central geometry through close-set or center-pull straps, a U-back, racerback, J-hook or correctly configured multiway design.
Test the bra with the actual top, blazer, bag and desk movements. Use a converter or sewn garment keeper only for a specific clothing conflict, and replace elastic that no longer recovers. A successful solution remains secure without shoulder pain, rigid posture or repeated adjustment through the workday.
Frequently asked questions
Why do my bra straps keep slipping at work?
The band may be loose, the cups may be pulling the bra forward, the straps may sit too widely for the shoulders, or work layers and bags may be moving them.
Should I tighten bra straps to stop slipping?
Adjust them until comfortably secure, but do not over-tighten. If the straps dig or the band rises, recheck band, cup and strap placement instead.
Can a loose bra band make straps fall down?
Yes. A loose band can ride upward and change strap tension, so the straps drift even after they have been shortened.
What bra style helps with sloping or narrow shoulders?
Close-set or center-pull straps, a U-shaped back, racerback, J-hook or cross-back option can place the straps farther from the shoulder edges.
Do racerback bras stop strap slipping?
They can because the straps are brought inward, but they must still fit correctly and should not create neck pressure or distort the cups.
Can clothing make bra straps slip?
Yes. Tight armholes, wide necklines, slippery linings, rough seams, blazers and bag straps can push or drag bra straps during movement.
Are bra strap clips safe for a full workday?
A smooth, correctly positioned clip can be useful after a home test, but stop using it if it causes pressure, rubbing, hardware damage or cup distortion.
When should I replace a bra with slipping straps?
Replace it when the band or strap elastic no longer recovers, adjusters keep moving, hardware is damaged or correct adjustment no longer stays secure.
Editorial and verification standards
This guide separates band, cup, strap and clothing causes rather than treating every falling strap as a request for more tension. Fit principles were checked against current official guidance from Bravissimo, which advises secure straps without digging and suggests racerback options for slippage; Wacoal’s five points of fit, which emphasizes that most support comes from the band; Panache’s fit guide, which includes strap adjustment and racerback guidance; and Chantelle’s fit guide, which evaluates strap tension alongside a level band and contained cups.
Construction options were cross-checked with the official Bravissimo bra-style guide for closer-set straps on full-cup bras, Wacoal bra anatomy for close-set strap terminology and Panache’s J-hook explanation for converting straps into a narrower racerback route. These are general construction references, not endorsements of a particular product or universal size method.
Before publishing a commercial module, verify the direct seller, exact style and variant, available sizes, band and cup construction, strap placement, adjustment range, materials, care, returns and current availability. Affiliate relationships should be clear and close to recommendations under the FTC endorsement guidance. No product ranking is present until those facts can be checked.
This information is educational and cannot diagnose pain, nerve symptoms, skin conditions or musculoskeletal problems. Stop using a bra or accessory that causes persistent pain, numbness, broken skin or breathing difficulty, and seek individualized help from a qualified fitter or healthcare professional where appropriate.